How to Import External Releases
The GlobalAI platform allows you to manage Kubernetes deployments that were originally created outside of the platform interface. By discovering and importing these existing releases, you can bring them under the platform's orchestration, monitoring, and governance framework.
See external releases
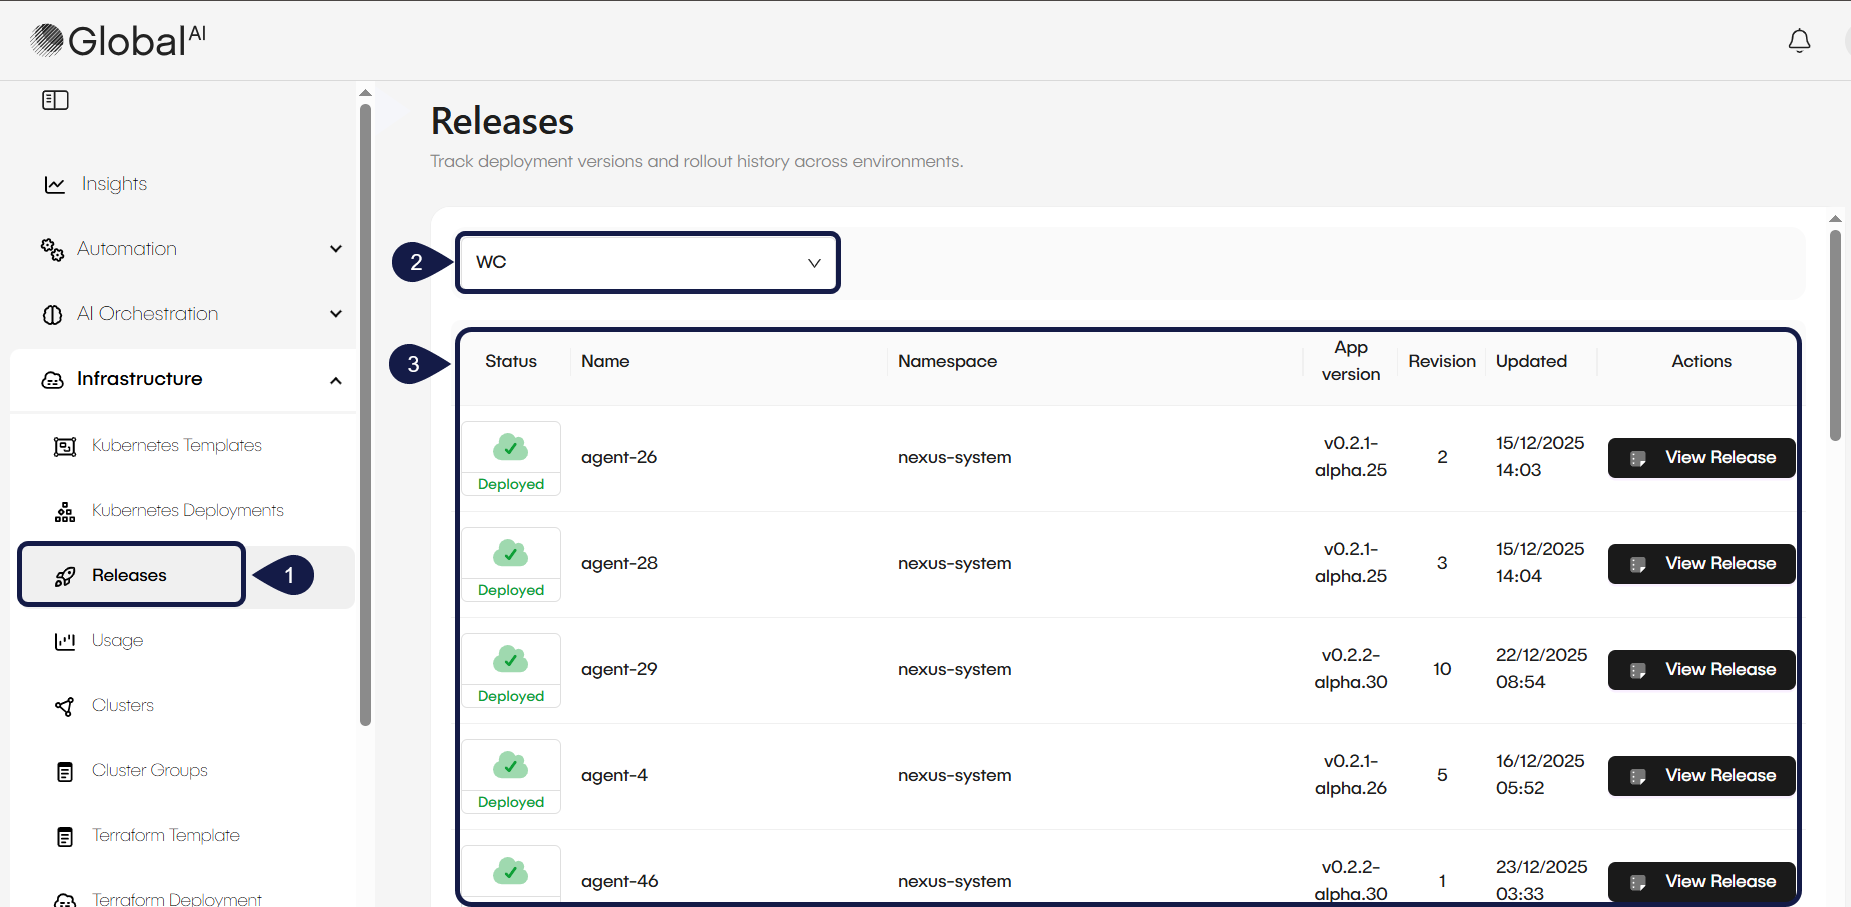
To manage external deployments, you must first identify which releases are currently running in your connected Kubernetes clusters but are not yet managed by the platform.
- Navigate to the Infrastructure menu and select Releases.
- Select the specific Cluster you want to scan from the dropdown menu.
- The platform displays a list of all active deployments found in that cluster that are not currently managed by GlobalAI. Review the list to identify the specific deployment you want to bring under platform management.
Import a release
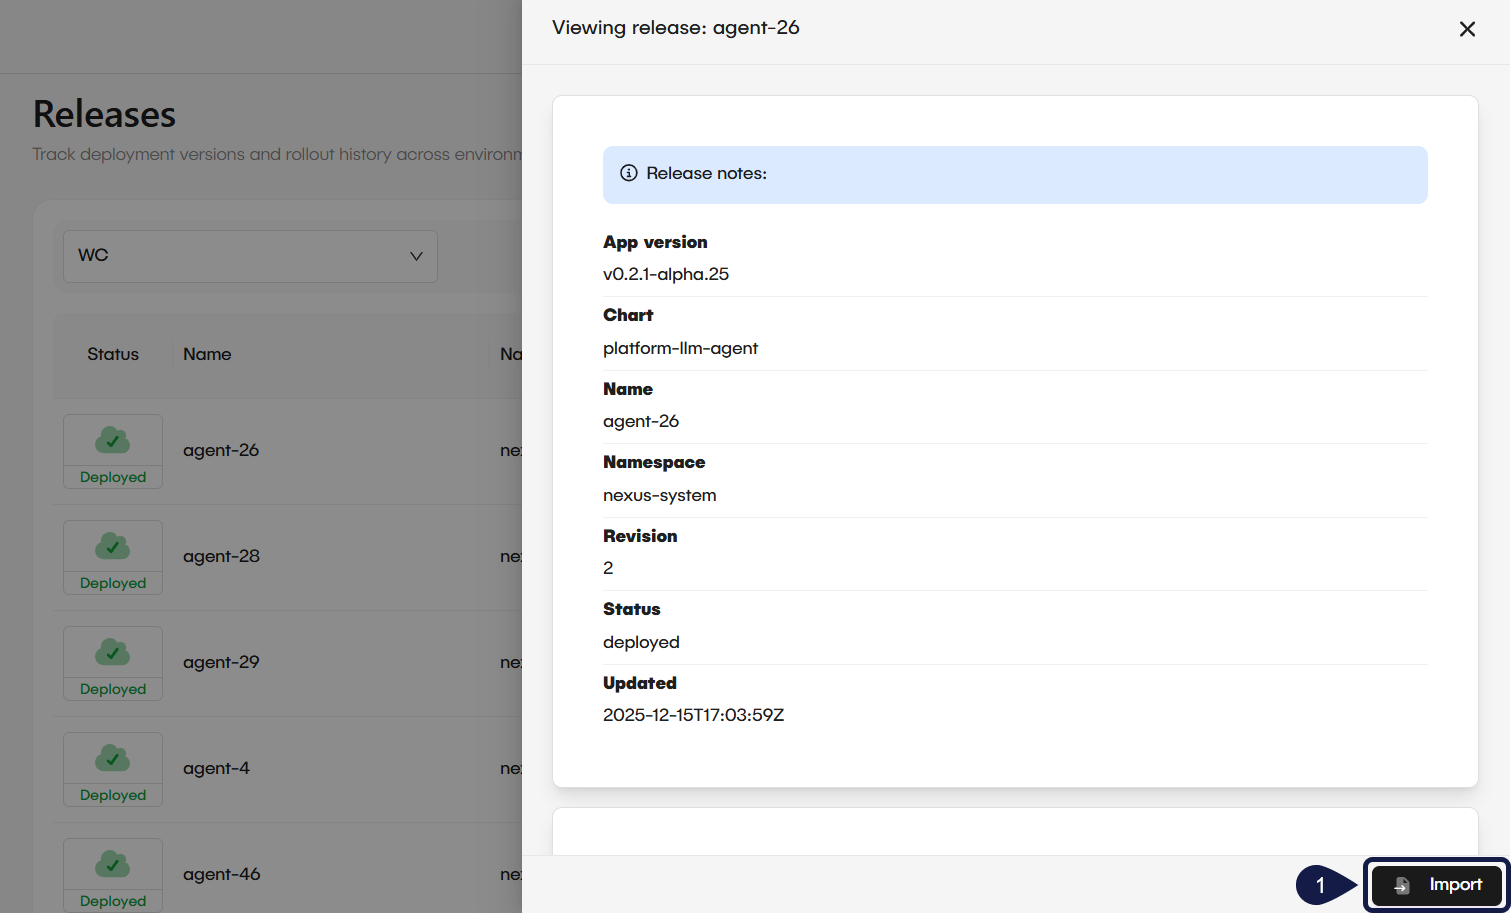
Once you have identified the external release, you can import it into your workspace to enable full lifecycle management.
- Access a deployment in the Releases list and click the Import button.
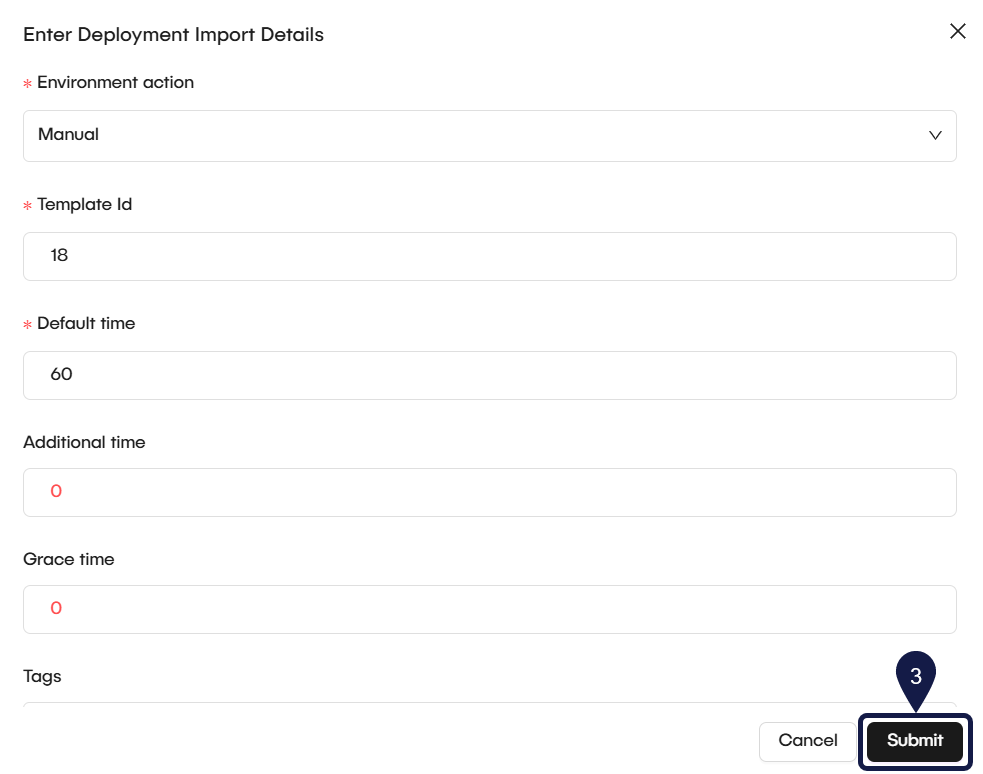
- In the Enter Deployment Import Details window, configure the following required fields:
- Cluster ID: Add the ID of the registered cluster the platform queries to locate the release during import.
- Name: Enter the release name as shown in the release notes.
- Owner: Enter an owner for the imported deployment. This value does not need to match the original release owner.
- Namespace: Specify the Kubernetes namespace where the release is deployed. This value must match the release notes.

- Environment action: Choose the lifecycle behavior for the deployment (Manual, Stop, or Terminate).
- Template ID: Assign the deployment to an existing template. This is required to track future versions, maintain configuration consistency, and enable automated rollouts.
- Default time: Set the default duration the environment remains active when automation is enabled.
- Additional time: Set extra time to extend the environment’s active duration.
- Grace time: Set the grace period before the environment action is enforced.
- Click Submit to finalize the process.
Post-import status
After a successful import, the deployment appears in your Kubernetes Deployments list. This change in status grants you access to advanced management features:
- Bulk Upgrades: The deployment becomes eligible for mass updates to new template versions alongside natively created deployments.
- Metrics Tracking: You can now view real-time data regarding CPU efficiency, RAM utilization, and total active hours.
- Manifest Synchronization: The platform enables live synchronization with the Kubernetes cluster to ensure you are viewing the most recent status of all resources.
Manage imported deployments
Once imported, the platform provides full visibility and control over the deployment, just as if it were created natively.
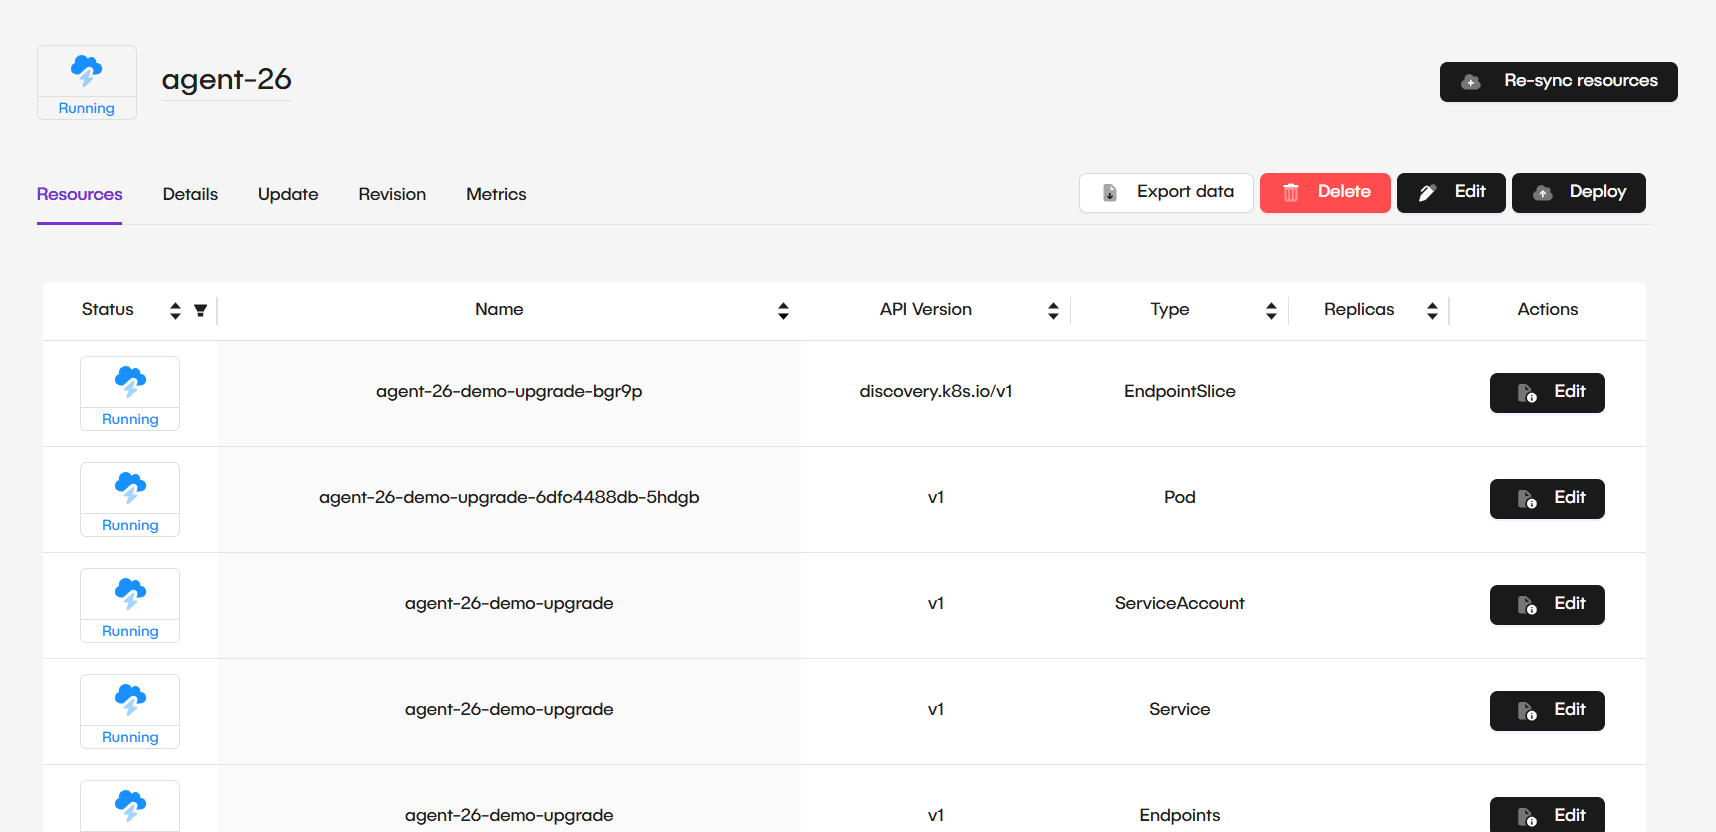
- Resource Monitoring: View the status of associated pods, services, and persistent volumes directly from the platform.
- Live Updates: Edit and update the Kubernetes manifest live from the cluster to ensure configuration consistency.
- Metrics: Access usage data, including CPU and RAM efficiency, through the platform's monitoring integration.
- Versioning: Assign the imported deployment to new template versions to perform bulk upgrades or rollbacks.
Related articles
Now that you know how to import external releases, you can explore these related guides.
Kubernetes vs Terraform Templates
Learn the difference between Kubernetes templates and Terraform templates in GlobalAI, and understand when to use each.
Update & Upgrade Deployments
Discover how to update individual deployments or perform bulk upgrades across your entire infrastructure.
Monitor Deployment and Metrics
Monitor the health, configuration, and resource efficiency of your Kubernetes deployments.